Proper installation of ADA compliant sinks is crucial for ensuring accessibility, safety, and long-term functionality in both residential and commercial bathrooms. These sinks are designed to meet the standards outlined by the Americans with Disabilities Act (ADA), which include specific requirements for height, clearance, and usability. Following best practices during installation not only ensures compliance with legal guidelines but also enhances the user experience for individuals with disabilities or mobility limitations.
The first step in installing an ADA-compliant sink is planning the layout. Careful measurement of the available space is essential to guarantee adequate knee and toe clearance, as well as proper faucet reach. The sink location should allow for a clear floor area of at least 30 by 48 inches in front of the basin to provide wheelchair users with sufficient maneuverability. Additionally, surrounding features such as doors, toilets, and other fixtures must be considered to avoid obstructions and ensure a smooth, accessible path to the sink.
Selecting the Right Sink and Accessories
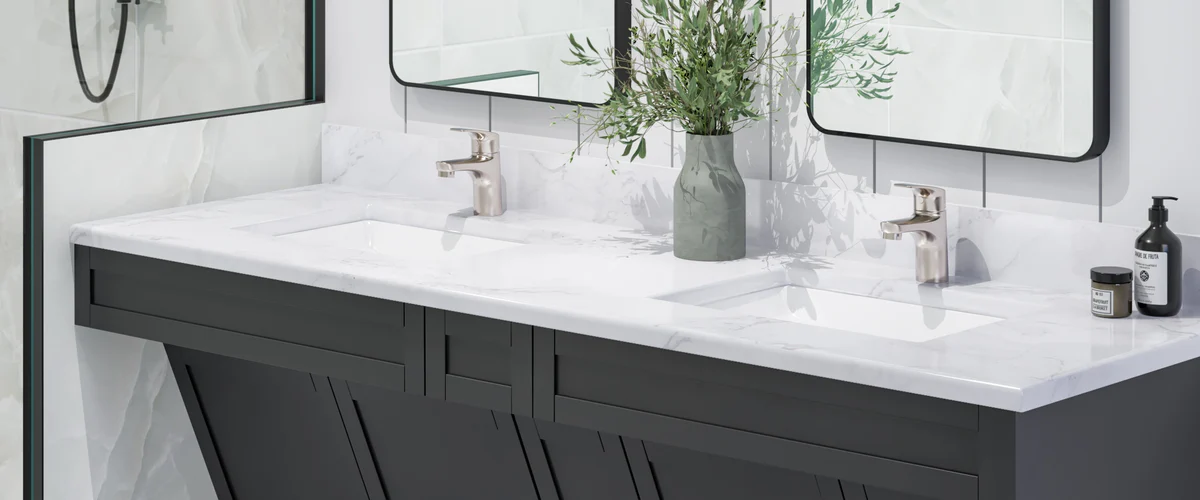
Choosing the appropriate sink type is a critical part of installation. Wall-mounted sinks are often the preferred option because they provide open space underneath for wheelchair access. Pedestal sinks and countertop sinks can also meet ADA standards if designed or modified to allow proper clearance. Faucet controls should be easy to operate, such as lever-operated, push-type, or sensor-activated options, to accommodate users with limited hand strength or dexterity. For high-quality options that combine accessibility, durability, and design flexibility, an ADA Compliant Sink is an excellent choice, offering solutions suitable for both public and residential applications.
Other accessories, including soap dispensers, paper towel holders, mirrors, and hand dryers, should be positioned within reach of users in wheelchairs, typically no higher than 40 inches from the floor. Correct placement of these elements ensures full accessibility and enhances the functionality of the bathroom.
Key Installation Steps
Installation begins with preparing the wall or floor to support the chosen sink. Wall-mounted sinks require reinforced walls or brackets capable of supporting the sink’s weight and resisting regular use. Pedestal or countertop sinks may require modifications to cabinetry or flooring to maintain proper knee and toe clearance. Plumbing adjustments are also often necessary, including repositioning water supply and drain pipes to allow adequate space beneath the sink and prevent interference with wheelchair users. Exposed plumbing should be insulated or covered to protect users from burns or injury.
Once the sink is positioned, installers must ensure that the height, alignment, and level are accurate according to ADA standards. The sink rim should not exceed 34 inches from the floor, while knee clearance beneath should be at least 27 inches high, 30 inches wide, and 19 inches deep. Toe clearance at the base of the sink is also required to allow comfortable access. Attention to these measurements ensures both compliance and usability for all users.
Safety and Stability Considerations
Proper mounting and support are vital for the long-term stability and safety of ADA-compliant sinks. Secure brackets, anchors, and fasteners prevent wobbling or detachment, which can pose safety risks. Rounded edges on the sink and covered plumbing further reduce the risk of injury. Additionally, the placement of accessories such as grab bars or splash guards can enhance stability and provide support for users who may need assistance while approaching or leaving the sink.
Maintenance and Inspection
After installation, regular inspection and maintenance are critical to ensure the sink continues to meet ADA standards. Check faucet operation, sensor functionality, and plumbing integrity periodically. Clean the sink and surrounding accessories using non-abrasive products to maintain hygiene and prevent damage. High-quality materials like stainless steel, solid surface composites, and engineered stone require minimal maintenance and are highly durable, making them ideal for both public and residential bathrooms.
Adapting Existing Bathrooms
Installing an ADA-compliant sink is also an effective way to retrofit existing bathrooms for accessibility. This may involve removing cabinets, adjusting plumbing, or modifying walls to create sufficient clearance. Wall-mounted sinks are particularly effective for retrofits because they allow flexibility in height and open space underneath. Retrofitting older bathrooms ensures compliance with ADA standards without requiring a full renovation, offering a practical solution for homeowners, business owners, and facility managers.
Benefits of Proper Installation
Correct installation of ADA sinks offers several advantages. It ensures legal compliance, reduces the risk of injury, and provides an accessible, user-friendly experience for individuals with disabilities. Properly installed sinks are durable and easier to maintain, which reduces long-term costs. In public spaces, compliant sinks demonstrate a commitment to inclusivity, while in residential settings, they enhance independence and safety for household members.
Conclusion
Installing an ADA-compliant sink requires careful planning, precise measurements, and proper installation techniques. Choosing the right sink type, ensuring correct clearance, positioning faucets and accessories correctly, and reinforcing support structures are all critical steps. When installed correctly, ADA sinks improve accessibility, safety, and convenience for all users, while ensuring compliance with ADA standards. Following best practices during installation creates bathrooms that are functional, durable, and inclusive, serving the needs of individuals with disabilities and mobility challenges for years to come.